How to use Tools
Category : 4th Class
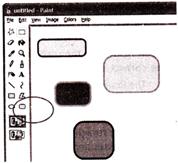
Microsoft Paint has an assortment of painting Tools that you can use for drawing shapes and applying colour to areas of your image in various ways. You switch between tools by clicking on the appropriate icon on the Toolbar, which is located on the left side of the Paint window.
![]() The Toolbar looks like this:
The Toolbar looks like this:
![]() : The top rows of Icons are the Selection Tools.
: The top rows of Icons are the Selection Tools.
![]() : The next row has the Eraser tool and the Fill tool Icons.
: The next row has the Eraser tool and the Fill tool Icons.
![]() : The third row has the Eye Dropper tool and the Magnifying Glass tool Icons.
: The third row has the Eye Dropper tool and the Magnifying Glass tool Icons.
![]() : The fourth row has the Pencil tool and the Paint Brush tool Icons.
: The fourth row has the Pencil tool and the Paint Brush tool Icons.
![]() : The fifth row has the Airbrush tool and the Text tool Icons.
: The fifth row has the Airbrush tool and the Text tool Icons.
![]() : The sixth row has the line tool and the curve tool Icons.
: The sixth row has the line tool and the curve tool Icons.
![]() : The seventh row has the Rectangle Drawing tool and the Polygon Drawing tool Icons.
: The seventh row has the Rectangle Drawing tool and the Polygon Drawing tool Icons.
![]() : The eighth row has the Oval Drawing Tool and the Rounded Rectangle Drawing Tool Icons.
: The eighth row has the Oval Drawing Tool and the Rounded Rectangle Drawing Tool Icons.
The bottom portion of the Toolbar changes when you select a tool to reveal additional options or settings for that tool. (See Figure 4.7.4)
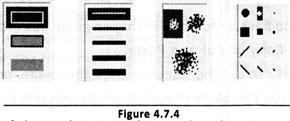
Most of the Tools are used to apply colour in some way to a portion of the image. In order to use these tools, first make sure that you have selected the correct colour in the Colour Palette.
![]() The Selection Tools
The Selection Tools
These tools are used to select portions of the image you are working with. These selections can then be moved around, copied or edited without affecting the rest of the image.
![]() To use the Freeform Select tool:
To use the Freeform Select tool:
![]() To use the Rectangle Select tool:
To use the Rectangle Select tool:
The Rectangular selection will also have a rectangular shaped guide box around it. With the selected area, you can Copy or Cut and Paste. To copy the selection, press Ctrl-C. To cut the selection from the image, press Ctrl-X. After Copying or Cutting, you can paste the selection by pressing Ctrl-V.
![]() Eraser
Eraser
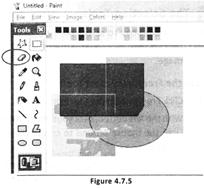
The Eraser tool is simple to use. Just click on it to select it, and then click on the part of the image that you want to erase. Erasing" changes the erased part of the image back to the background colour of the image file. This is usually white, but can be changed to other colours using the colour palette. The size of the eraser can be changed by clicking on the Options portion of the Toolbar when the Eraser is active. Use a smaller eraser for the small details and the larger eraser to wipe out larger areas of the image. (See Figure 4.7.5)
![]() Fill Tool
Fill Tool
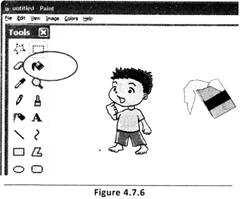
The fill tool applies colour (or "paint") to a large area of the image. The Icon for the Fill Tool resembles a pouring can of paint. Just as you would pour a liquid in real life, the Fill Tool's "paint" will fill an area's shape with colour. You have to be careful when using the Fill Tool because if you click in an unbounded area of the image, the colour will "spill" out and "leak" to other parts of the image. There are no special options for the Fill Tool. (See Figure 4.7.6)
![]() Eye Dropper
Eye Dropper
The Eyedropper tool has only one useful function. It can be used to "pick up" colours that you have already used in an image. Suppose you are working with an image with many shades of Green and want to pick a specific shade, but there are many similar shades. Just click on the eyedropper, and click on the exact portion of the image that contains the colour that you want. The active colour for your paint tools will automatically change to the colour that you picked with the eyedropper.
![]() Magnifying Glass Tool
Magnifying Glass Tool
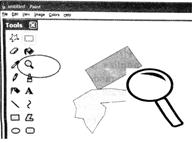
The Magnifying Glass, or Zoom tool, can be used to get a closer, more detailed view of an image. This is very useful if you are working in close with the fine details of a part of an image. You can click on the part of the image that you want the magnification to center on. This will not affect the actual image in any way, but only how it appears on your screen temporarily. Once you zoom in, the magnifying glass will automatically switch back to whatever tool you were using before. (See Figure 4.7.7)
![]() Pencil Tool
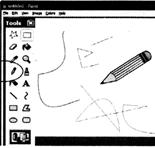
Pencil Tool
The Pencil tool is a basic drawing tool. You can draw in different colours, there are no other options. The pencil's stroke is a single pixel wide, which makes it useful for working with fine details. (See Figure 4.7.8)
![]() Paint Brush Tool
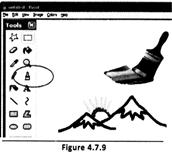
Paint Brush Tool
The Paint Brush tool is similar to the pencil, but has more features. It can be used in different colours, and the shape and size of the Paint Brush can also be changed. You can use square, round and slanted shaped brushes, of various sizes, selected in the Toolbar Options. (See Figure 4. 7. 8)
![]() Airbrush Tool
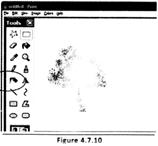
Airbrush Tool
The Airbrush tool is a bit more complicated than the regular paintbrush. Instead of applying colour to the image evenly, it applies it gradually. The "spray" is a semi-random distribution of pixels. The airbrush can paint at three different sizes, selected through the Options portion of the Toolbar. (See Figure 4.7.10)
![]() Text tool
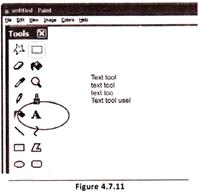
Text tool
The Text tool is used to position and enter text into your image. The text may be of any colour or font that you have activated on your computer. To use the Text tool, simply select it from the Toolbar and then drag a rectangle within your image. This rectangle will be the boundaries within which the text will appear. Once you have drawn the text boundary, a floating window will appear, which will enable you to select the font, size and formatting (i.e., bold, italic or underline) for your text. As long as he text tool is active, you will see rectangular boundary around the edge of the text area. (See Figure 4.7.11)
![]() Line Tool
Line Tool
The Straight Line tool is an easy tool to work with. You can change the colour and width of your lines by using the Toolbar Options. To draw a line, click on the image where you want one of the line's endpoints to be, and then drag over to where you want the other endpoint to be and finally release the button. (See Figure 4.7.12)

![]() Curve Tool
Curve Tool
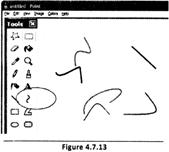
Like the straight Line tool, the Curve tool can make lines in various thicknesses and colours. Clicking and dragging the points to make one kind of line, clicking and releasing two endpoints. Click a third point to determine the curve. (See Figure 4.7.13)
![]() Shapes Tools
Shapes Tools
The Shape tools are all very similar to each other.
![]() Rectangle
Rectangle
The Rectangle tool draws three types of rectangles: outline, filled with outline and filled without outline. The interior of the outline rectangle is transparent whereas the filled types fill the rectangle with the background colour. To draw a rectangle, click tool, then click a point on the image where you want one corner to be, then drag diagonally and release the mouse where you want the opposite corner to be. (See Figure 4.7.14)
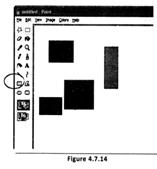
Tip: To create a square shape, hold down the Shift Key as you draw the shape.
![]() Polygon
Polygon
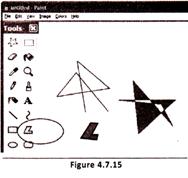
The Polygon tool is similar to the rectangle, but works a bit differently. To create a polygon, activate the tool from the tool bar. Then, click the image wherever you want your first vertex to be. A vertex is like a corner. Draw the edges of the shape like you would use the Straight Line tool and then simply connect the last edge to the first vertex and the shape will finish. Polygons are great for creating all kinds of irregular shapes. (See Figure 4.7.15)
![]() Oval
Oval
The Oval Tool is similar to the Rectangle tool. Like the other shapes, you can create ovals that are just empty outlines, filled outlines or filled with no outline. (See Figure 4.7.16)
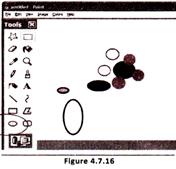
Tip: To create perfect circles, hold down the shift key as you draw the shape.
![]() Rounded Rectangle
Rounded Rectangle
The Rounded Rectangle tool is like a cross between the Rectangle Tool and the Oval Tool. It draws rectangles, but instead of having sharp 90 degree angle corners, they will be somewhat rounded. You can create rounded rectangles with empty outlines, filled outlines or filled with no outline. (See Figure 4.7.17)
Tip: To create rounded squares, hold down the shift key as you draw the shape.

![]() Match the following:
Match the following:
A B
1. Eyedropper i. Basic tool
2. Pencil ii. To zoom
3. Magnifying tool iii. Pick up used colour
(A) 1, iii, 2, i, 3, ii
(B) 1, iii, 2, ii. 3, i
(C) 1, i, 2, ii, 3, iii
(D) 1, i, 2, iii, 3, ii
(E) 1, ii, 2, iii, 3, i
Answer: (a)
Explanation
Correct Option:
(A) Option (A) is matched correctly.
Incorrect Options:
(B) Option (B) is matched incorrectly.
(C) Option (C) is matched incorrectly.
(D) Option (D) is matched incorrectly.
(E) Option (E) is matched incorrectly.
![]() Given below are the statements about the different types of tools. Select the correct statements.
Given below are the statements about the different types of tools. Select the correct statements.
1. The Rounded Rectangle tool is like a cross between the Rectangle Tool and the Oval Tool.
2. The Oval Tool is similar to the Curve tool.
3. Like the straight Line tool, the Curve tool can make lines in various thicknesses and colours.
(A) 1 and 2
(B) 1 and 3
(C) 2 and 3
(D) Only 2
(E) Only 3
Answer: (b)
Explanation
Correct Option:
(B) Statements 1 and 3 are correct.
Incorrect Options:
(A) Statement 1 is correct but statement 2 is incorrect. Therefore, option (A) is incorrect.
(C) Statement 3 is correct but statement 2 is incorrect. Therefore, option (C) is incorrect.
(D) Statement 2 is incorrect because Oval Too! is similar to the rectangle tool.
(E) Not only statement 3 is correct but statement 1 is also correct.


You need to login to perform this action.
You will be redirected in
3 sec

