Category : 7th Class
Working With Microsoft Word 2013
Introduction
The Microsoft Word brings new revolution in documentation. Windows platform of Word was released in 1989. Since 1989, many versions of Word has been launched by Microsoft, such as Word 95, Word 97, Word 2000, Word 2002, Word 2003, Word 2007, Word 2010, Word 2013 and word 2016.
Microsoft Word is a popular word processing software that allows the user to create more accurate, concise and correct documents. It's also useful to create brochures, memos, merging letters and newsletters. Microsoft Word enables you to create documents using text formatting, graphic, chart and page formatting tools. Using Microsoft Word, you can add text, tables and graphics more easily.
Word enables various features that allow creating different kinds of documents.
Important Elements in Word 2013
|
Element |
Description |
|
Title bar: |
Displays the name of the active document and it is present at the top of the window. |
|
Ruler: |
Word contains two types of ruler including horizontal and vertical. Ruler provide measurement of ongoing page as well as quick access to margins, tabs and indents. It is present below the toolbar and on the left side of the application window. |
|
Scroll bars: |
Allows viewing different areas of the active document. It is positioned along the right side and bottom of the text area. |
|
Status bar: |
Displays various types of information about the active document, such as the current page number. It is positioned across the bottom of the application window. |
|
Minimize button |
It is the first of three buttons located in the upper-right corner of a window. It reduces the window to an icon on the taskbar. |
|
Maximize/Restore |
Allows changing the size of window. |
|
Document close |
Allows closing the document window. |
|
Quick Access |
The Quick Access toolbar provides one click access to commonly used commands and options. By default, it is located on the left side of the Title bar and displays the Save, Undo and Redo commands. You can change the location of the Quick Access Toolbar as well as customize it to included command that you use frequently.
|
|
Ribbon |
The Ribbon is displayed just below the title bar. It consists of a set of tasks specific tabs, each of which has many groups of commands. |
|
Dialog box launcher |
The dialog box launcher is present at the bottom right corner of a group, clicking the dialog box launcher gives you access to additional commands via a dialog box. |
|
Document window |
A document window is also called document or text area. This is the area where we can type text, insert pictures, graphics, etc. or display the content of the document. |
|
Cursor |
A blinking vertical line that indicates where text or object will be inserted. |
Moving and Copying Text
When you copy a text, it generate a duplicate copy of original text while the original text is present at the original position but when you move a text then the text disappears from the original position and appears at the new position. MS-Word allows you to move or copy the text in the same document or in another document.
For moving the text:
v Select the text which you want to move.
v Select Home tab ![]() Clipboard group
Clipboard group ![]() Cut option or press Ctrl + X key.
Cut option or press Ctrl + X key.
v Position the insertion point where you want to insert the text and then select Home tab ![]() Clipboard group
Clipboard group ![]() Paste option or press Ctrl + V key.
Paste option or press Ctrl + V key.
To copy a text:
v Select the text which you want to copy.
v Select Home tab ![]() Clipboard group
Clipboard group ![]() Copy option or press Ctrl + C key.
Copy option or press Ctrl + C key.
v Position the insertion point where you want to insert the text and then select Home tab ![]() Clipboard group
Clipboard group ![]() Paste option or press Ctrl +V key.
Paste option or press Ctrl +V key.
Deleting Text
Word enables you to remove a particular text or blocks of text from the document. To delete the text select the text that is to be deleted and press Delete or Backspace key.
Formatting a Paragraph
MS-Word enables paragraph formatting that includes text alignment, setting margins and line spacing. While applying formatting, it affects the entire paragraph even if a single word is selected or the insertion point is placed in the paragraph.
To format a paragraph:
v Select the paragraph/paragraphs to which the formatting has to be applied.
v Select Page Layout ![]() Paragraph group
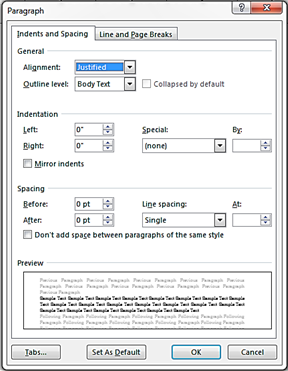
Paragraph group ![]() Paragraph dialog box launcher to display the Paragraph dialog box.
Paragraph dialog box launcher to display the Paragraph dialog box.
v In the General section, set the alignment of the paragraph from the Alignment drop-down list.
v In the Indentation section, set the left, right and special indents from Left, Right and Special drop-down list.
MS-Word also enables the following alternative methods to align the paragraph:
v Click ![]() Align Left on Home tab in Paragraph Group for left aligning the text.
Align Left on Home tab in Paragraph Group for left aligning the text.
v Click ![]() Align Center on Home tab in Paragraph Group for center aligning the text.
Align Center on Home tab in Paragraph Group for center aligning the text.
v Click ![]() Align Right on Home tab in Paragraph Group for right aligning the text.
Align Right on Home tab in Paragraph Group for right aligning the text.
v Click ![]() Align Justify on Home tab in Paragraph Group for justifying alignment of the text.
Align Justify on Home tab in Paragraph Group for justifying alignment of the text.
v Set the spacing before and after the paragraph from the before and after drop- down list. The spacing between each line can be set by selecting a value from the Line Spacing drop-down list.
v Click OK to apply the formatting.
Apply Font and Font Size
How to apply font and font size:
To set the font style, select the required font style from the Font style list.
Apply Font Color in Document
Words enables color palette that helps to use color in your document.
How to apply font color:
v Select the text you want to change.
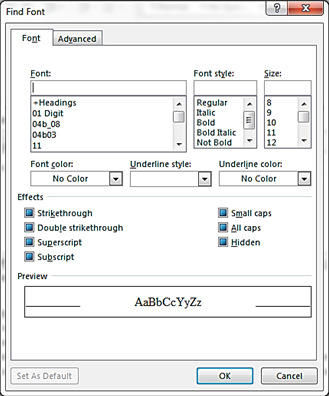
v Click Home tab ![]() Font group to open Font dialog box, as shown in the given figure:
Font group to open Font dialog box, as shown in the given figure:
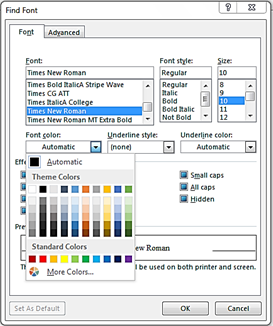
v Select the required font color from the Font color drop - down list.
v The font color of the selected text will be changed.
How to highlight the text with color:
v Select the text that you want to highlight.
v Click text highlight button on the Home tab and click the Text Highlight Color drop down arrow the Highlight Color menu will appear.
v Choose the color you want then the selected text will be highlighted.
Apply Underline, Bold and Italic
To apply the underline for the selected text:
v Select the text that is to be appear as underline in the document.
v Select the required underline style from the Underline style drop-down list.
To set the underline color:
v Select the required underline color from the Underline color drop-down list.
To apply a particular effect on the text:
v Select the check box for the particular effect such as shadow from the Effects section.
MS-Word also enables the following alternative methods that can be used to apply bold, underline and italic:
v Click ![]() Bold to make the selected text bold.
Bold to make the selected text bold.
v Click ![]() Underline to underline the selected text
Underline to underline the selected text
v Click ![]() Italic to make the selected text italic. ,
Italic to make the selected text italic. ,
Printing a Document
To print a document you need to perform the following steps:
v Click File tab and select print option to open Print dialog box.
v In the Copies option, type the number of copies that is to be printed.
v Click OK.
· Under Printer option, make sure the printer you want is selected.
· If you want to change the setting of your printer click the setting you want to change and then select a new setting.
v When you are finished, click Print.
Note: Ctrl + P can also be used to print the entire file.
Word Counting
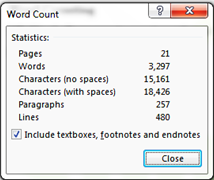
MS-Word allows you to count number of pages, words, characters (without spacer characters (with space), paragraphs, and lines in a document.
How to apply word count:
v Select Review tab ![]() Word Count to display the Word Count Dialog box.
Word Count to display the Word Count Dialog box.
The Word Count Dialog box displays all information including number of pages, words, character (without space), character (with space), paragraphs and lines in a document.
Find and Replace Text
MS Word provides the facility to search or match specific text in the document. You can also replace the searched text with other text. This facility is very useful because it minimizes the time and effort required for searching the text in the document.
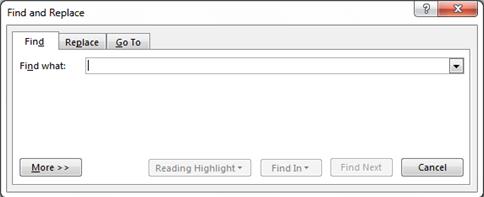
How to open the Find & Replace dialog box:
v Select the Home tab ![]() Editing Group
Editing Group ![]() Replace option to open the Find and Replace dialog box, as shown in the above given figure.
Replace option to open the Find and Replace dialog box, as shown in the above given figure.
v Enter the word or text, which you want to search for in the Find what list box and click the Replace tab.
v Enter the word that you want to replace in Replace with list box.
v Click Find Next for finding specified word. This will highlight the word in the whole document.
v Click Replace All for replacement of word in the whole document or click Replace to replace the current highlighted word.
Inserting an Image Using Clipart
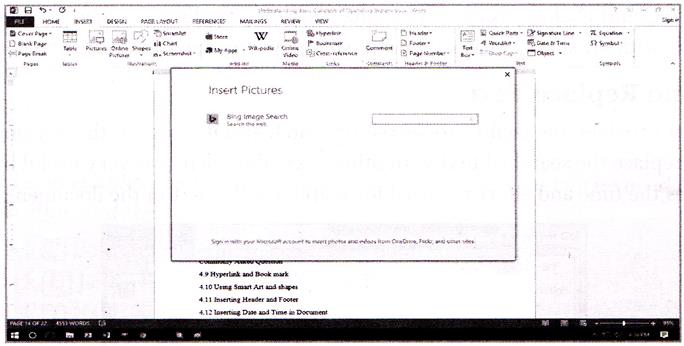
To make your document look attractive, you can insert images that corresponds with the text. To find and insert Image using Clipart (Variety of Online sources) option, follow the steps listed below:
1. On the Insert tab, in the Illustrations group, click the Online Pictures button.
2. Under Insert Picture Dialog box, type the text in Bing Image Search Box.
3. Press the Enter key.
4. Click the image you want, or refine your search by repeating Steps 2 and 3.
5. Click on the Insert button.
Inserting an Image from another file or folder
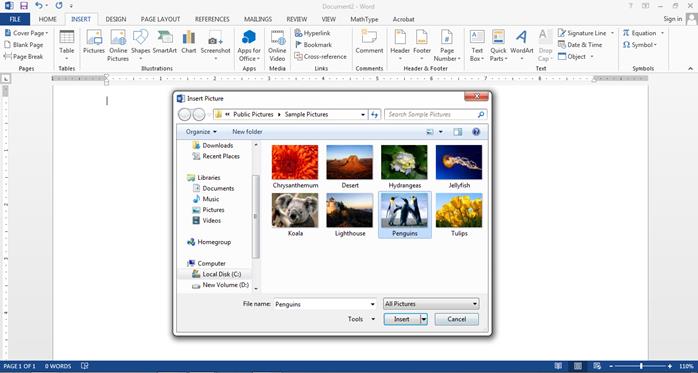
Follow the steps given below to insert an image from another file or folder:
1. Place the insertion point where you want the image to appear.
2. Select the Insert tab on the Ribbon, then click the Pictures command under Illustrations Group.
3. The Insert Picture dialog box will appear. Browse the picture in your computer.
4. Select an Image and then click on Insert button.
5. The image will appear in the document.
Hyperlink and Bookmark
Hyperlink
A Hyperlink is colored and underlined text or a colored and underlined graphic that can be used to open any one of the following items:
v A file.
v A location in a file.
v A web page on the web.
By adding hyperlinks to text can provide access to websites and email addresses directly from your document.
For example, open the document, let document 'x' is the document that will contain the hyperlink and the document to which you are linking is document y.
Steps to create Hyperlink:
1. Select the text you want to set as Hyperlink.
2. On the Insert tab, in the Links group, click the Hyperlink button.
3. The Insert Hyperlink dialog box will appear.
4. The selected text will appear in the Text to display: field at the top. You can change this text if you want.
5. In the Address: field, type the address of website or location of file you want to link to, then click OK.
6. The text will be set as a Hyperlink.
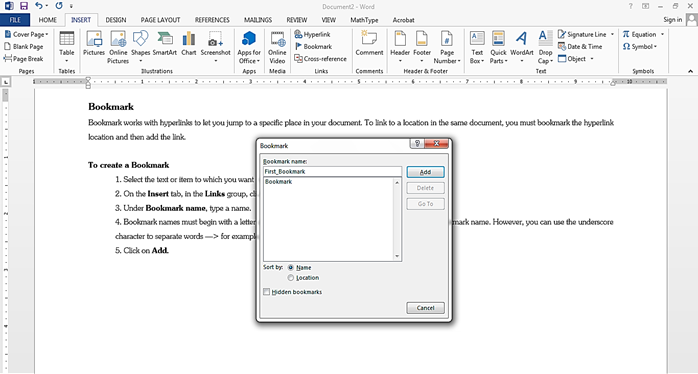
Bookmark
Bookmark works with hyperlinks to let you jump to a specific place in your document. To link to a location in the same document, you must bookmark the hyperlink location and then add the link.
To create a Bookmark
Using Tabs
The tab selector is above the vertical ruler on the left. Hover over the tab selector to see the name of the type of tab that is active.
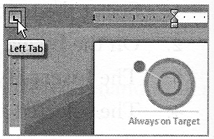
The tab options are:
Introducing Mail Merge
The Mail merge-feature allows you to write to many different people with the same information which can be modified for each individual. It also helps you to create personalized letters and other documents by combining data from two different files. These two files are data source file, which stores the variable data to be added and a main document file, which contains the same information for all the documents. Combining the contents of a data source with a main document is known as merging.
To use Mail Merge option, follow the steps given below:
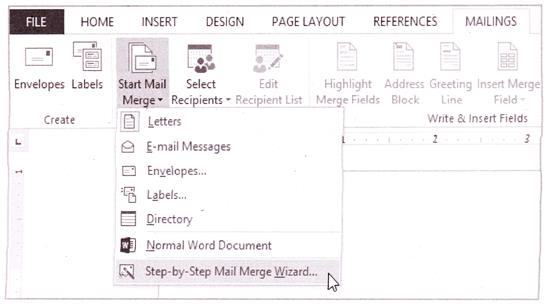
The Mail Merge pane appears and will guide you through the six main steps to complete a merge. The following example demonstrates how to create a form letter and merge the letter with a recipient list.
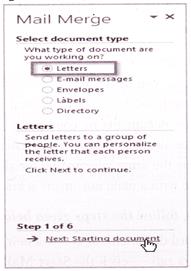
Step 1:
Choose the type of document you want to create. In our example, we'll select Letters. Then click on Next: Starting document to move to step 2
Step 2.
Select Use the current document, then click Next: Select recipients to move to Step 3.

Step 3:
Now you'll need an address list so that Word can automatically place each address into the document. The list can be in an existing file, such as an Excel workbook, or you can type a new address list from within the Mail Merge Wizard.
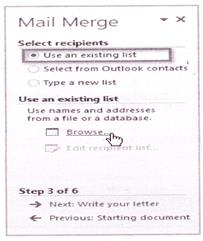
1. From the Mail Merge task pane, select Use an existing list, then click Browse to select the file.
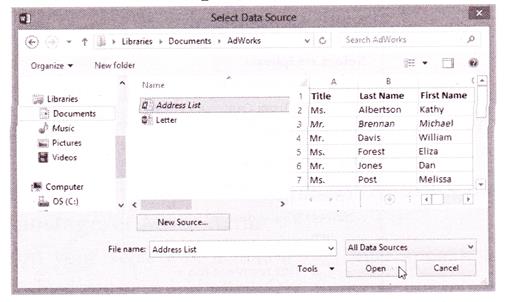
2. Locate your file and click on Open button.
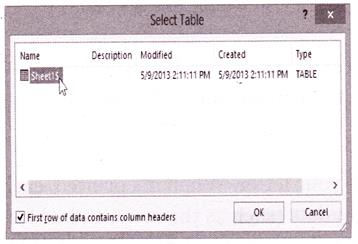
3. If the address list is in an Excel workbook, select the worksheet that contains the list and click OK.
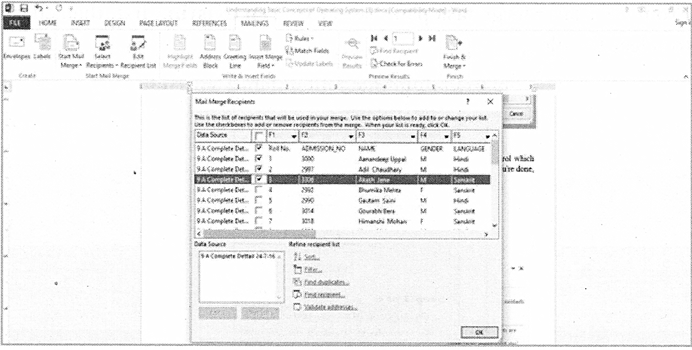
4. In the Mail Merge Recipients dialog box, you can check or uncheck each box to control which recipients are included in the merge. By default, all recipients will be selected. When you're done, click OK.
5. From the Mail Merge task pane, click Next: Write your letter to move to Step 4.

Note: If you don't have an existing address list, you can click the Type a new list button and click Create. You can then create your address list.
Step 4:
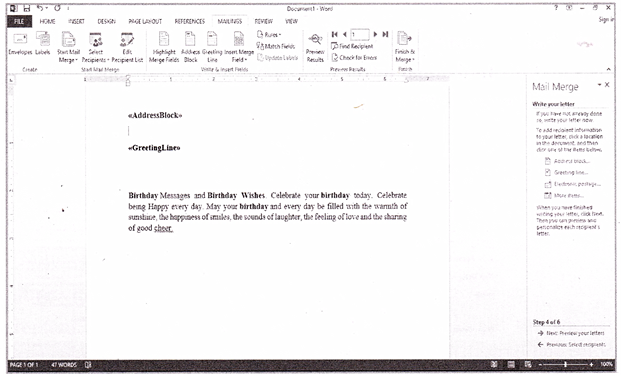
Now you're ready to write your letter. When it's printed, each copy of the letter will be the same, only the recipient data (such as the name and address) will be different. You'll need to add placeholders for the recipient data so that Mail Merge knows exactly where to add the data.
To insert recipient data:
1. Place the insertion point in the document where you want the information to appear.
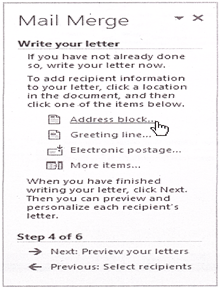
2. Choose one of the four placeholder options: Address block, Greeting line, Electronic postage, or More items.
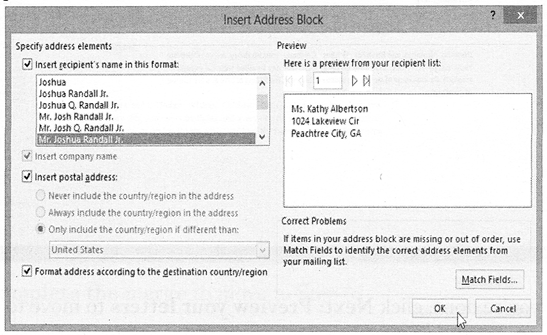
3. Depending on your selection, a dialog box may appear with various options. Select the desired options and click OK. Suppose we selected Address, block it will appear as:
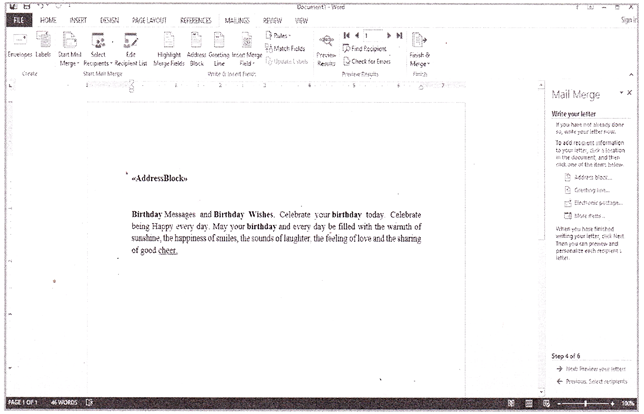
4. A placeholder will appear in your document (for example, «Address Block»).
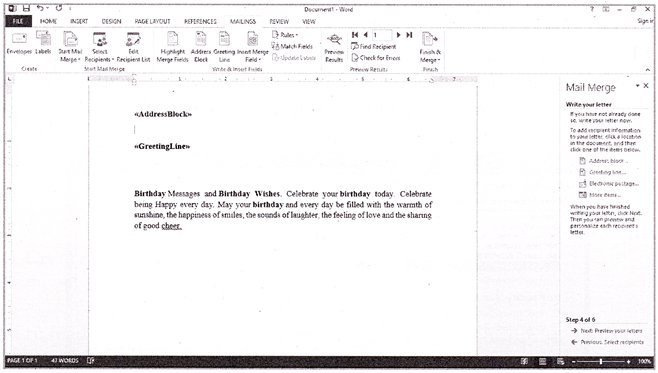
5. Repeat these steps each time you need to enter information from your data record. In our example, we'll add a Greeting line. A placeholder will appear in your document (for example, «Greeting Line»).
6. When you're done, click Next: Preview your letters to move to Step 5.
Step 5:
Preview the letters to make sure that the information from .the recipient list appears correctly in the letter. You can use the left and right scroll arrows to view each document.
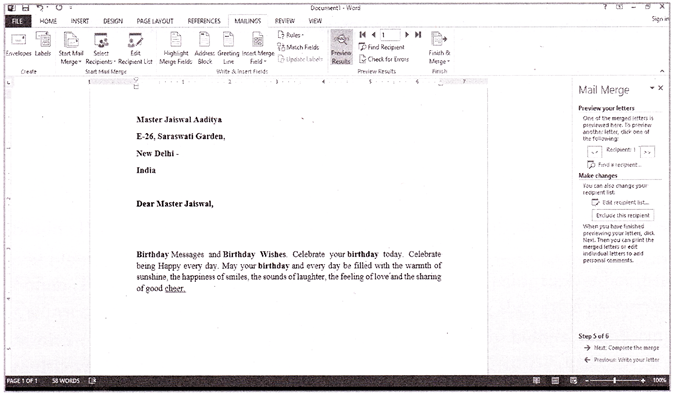
Click Next: Complete the merge to move to step 6.
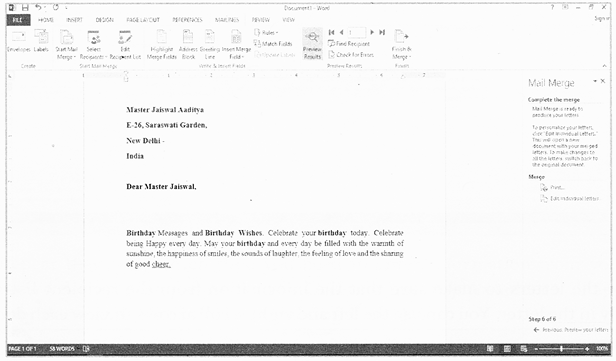
Step 6:
1. Click Print to print the letters.
2. Click on Edit Individual letter to personalize. This will open a new document with your merged letters.


You need to login to perform this action.
You will be redirected in
3 sec